How to Create an Ad Unit
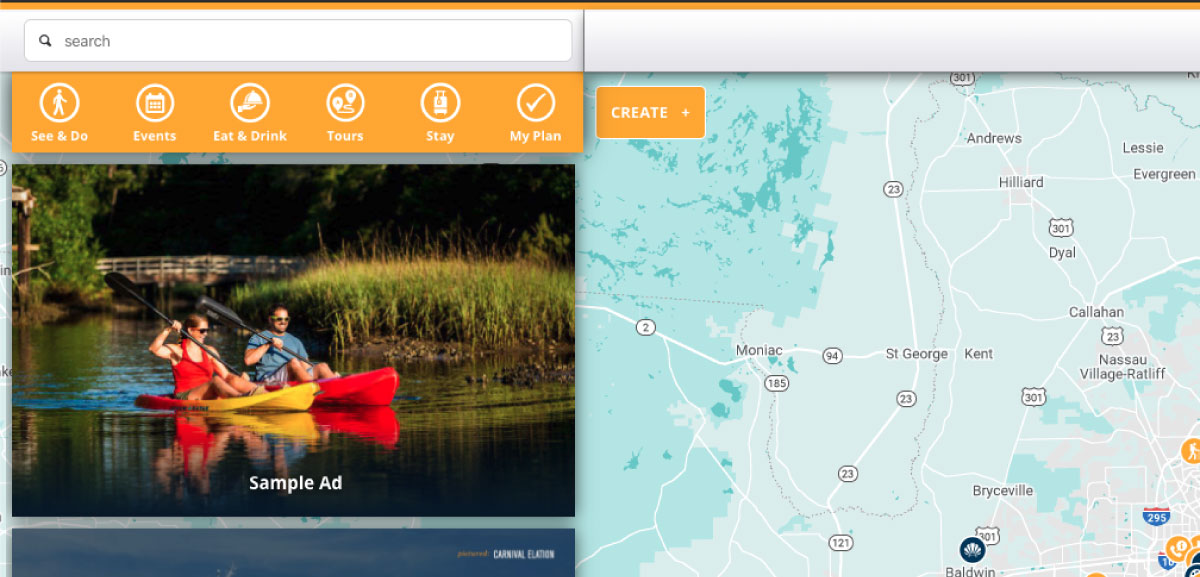
To create an ad unit, log in and make sure admin mode is turned ON. When it is on, you will see the Create+ button appear in the top left of the map.

Click Create+ and a modal opens, allowing you to create a new Event, Place or Ad Unit. Select Ad Unit.

The next page allows you to:
- Enter a name for the ad (only shows when viewing the list of ads running and on the mobile view of the ad)
- Select an image file from your computer (this can be any height you want but the system will adjust the width to 960px)
- **Optional** Select a start and end date for the ad, if there is a particular date range you would like it to run. If not, it will persist until you add an end date or delete the ad.
- Enter the click through URL. This is the URL the ad unit takes the user once they click.
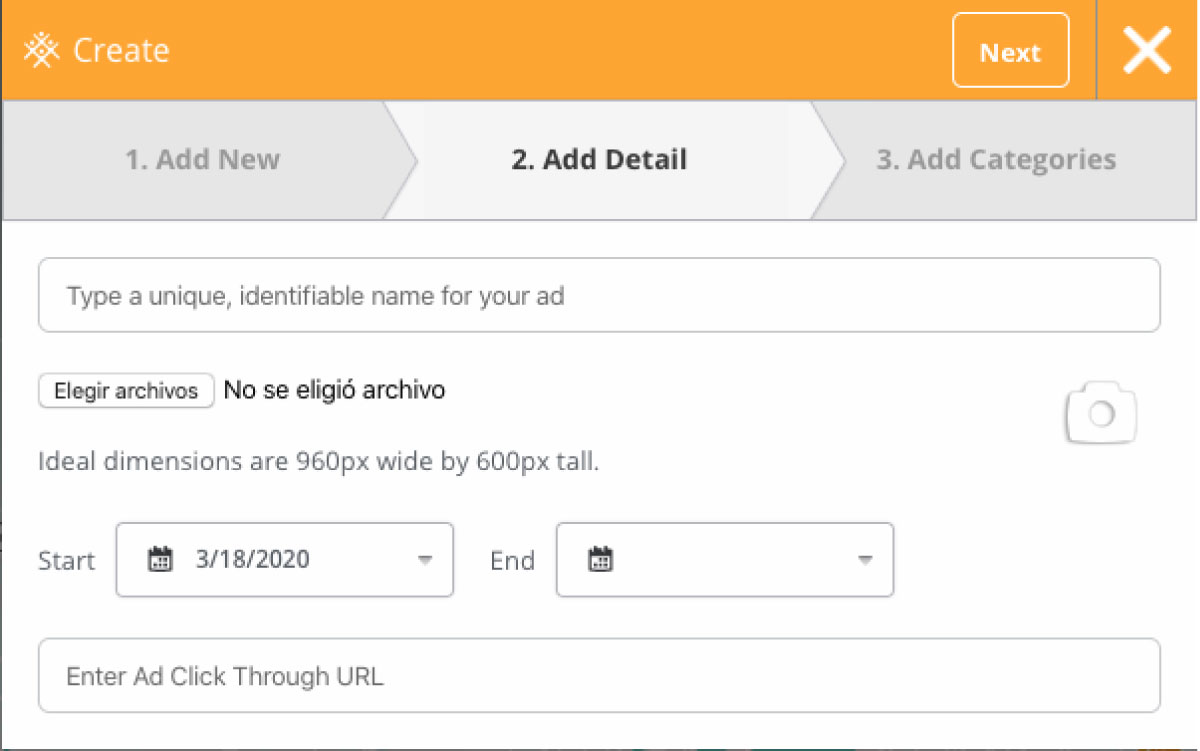
Click Next and select the categories applicable to the ad unit. A user will have to have at least one of the categories selected for the ad to show up in their feed.

Editing an ad unit
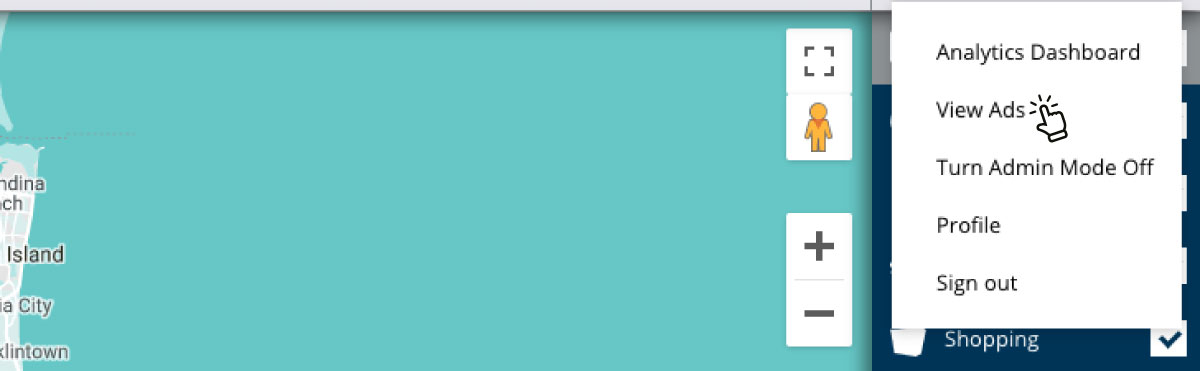
Log into the widget and click your name in the top right. In the dropdown, select View Ads.
The ads you have created will appear on the left hand side, similar to places and events in other list views.
Select the ad unit you would like to edit and the ad unit flyout will open.

Select Edit to update the run time, click through URL, title, image and categories.

Once edits are made, click Done.
Note: You can drag and drop the order of the ads from the ad unit list view to change the order they are viewed by end users.


